First steps
First steps
Starting at the Front
Right now, after a fresh installation, and after added the opstutorial user,
if we visit the <apihost> you will see a very simple page with:
Welcome to Nuvolaris static content distributor landing page!!!
That’s because we’ve activated the static content, and by default it
starts with this simple index.html page. We will instead have our own
index page that shows the users a contact form powered by OpenServerless
actions. Let’s write it now.
Let’s create a folder that will contain all of our app code:
contact_us_app.
💡 NOTE
You can find the full source code of the tutorial at this GitHub Repository: Contact Us App.
The repository has a tag for each step. So after cloning it in your local directory, follow the istruction on it’s README page.
Inside that create two new folders called web, which will store our static
frontend, and packages, which will store our backend actions.
Inside the web folder an index.html file.
The directory structure should look like:
contact_us_app
├── packages
└── web
    └── index.html
Paste the following markup inside the index.html file:
<!DOCTYPE html>
<html lang="it">
<head>
    <meta charset="UTF-8">
    <meta name="viewport" content="width=device-width, initial-scale=1">
    <title>Get In Touch</title>
    <link href="https://cdn.jsdelivr.net/npm/bootstrap@5.3.3/dist/css/bootstrap.min.css" rel="stylesheet">
</head>
<body>
<nav class="navbar navbar-dark bg-dark">
    <div class="container">
        <a class="navbar-brand" href="#">Apache OpenServerless™ Tutorial</a>
    </div>
</nav>

<div class="container d-flex justify-content-center align-items-center" style="min-height: 80vh;">
    <div class="w-50 p-4 border rounded bg-light shadow">
        <h2 class="text-center mb-4">Get In Touch</h2>
        <form>
            <div class="mb-3">
                <label for="name" class="form-label">Name</label>
                <input type="text" class="form-control" id="name" name="name" placeholder="Insert your name">
            </div>
            <div class="mb-3">
                <label for="email" class="form-label">Email</label>
                <input type="email" class="form-control" id="email" name="email" placeholder="Insert your email">
            </div>
            <div class="mb-3">
                <label for="phone" class="form-label">Phone Number</label>
                <input type="tel" class="form-control" id="phone" name="phone" placeholder="Insert you phone number">
            </div>
            <div class="mb-3">
                <label for="message" class="form-label">Message</label>
                <textarea class="form-control" id="message" name="message" rows="4" placeholder="Type here your message"></textarea>
            </div>
            <button type="submit" class="btn btn-primary w-100">Send !</button>
        </form>
    </div>
</div>

<script src="https://cdn.jsdelivr.net/npm/bootstrap@5.3.3/dist/js/bootstrap.bundle.min.js"></script>
</body>
</html>
⚠ WARNING
Before move on, be sure to have completed once the login as indicated here
Now we just have to upload it to our OpenServerless deployment. You
could upload it using something like curl with a PUT to where your
platform is deployed at, but there is an handy command that does it
automatically for all files in a folder:
ops ide deploy
The output will be:
> Scan:
> Deploying:
build process exited with code 0
UPLOAD ASSETS FROM web
==================| UPLOAD RESULTS |==================
| FILES      : 1
| COMPLETED  : 1
| ERRORS     : 0
| SKIPPED    : 0
| EXEC. TIME : 37.83 ms
======================================================
URL: http://opstutorial.localhost:80
The command will scan both packages and web directories and will
upload the index.html to the web bucket. Finally it will show the
URL where the frontend have been published.
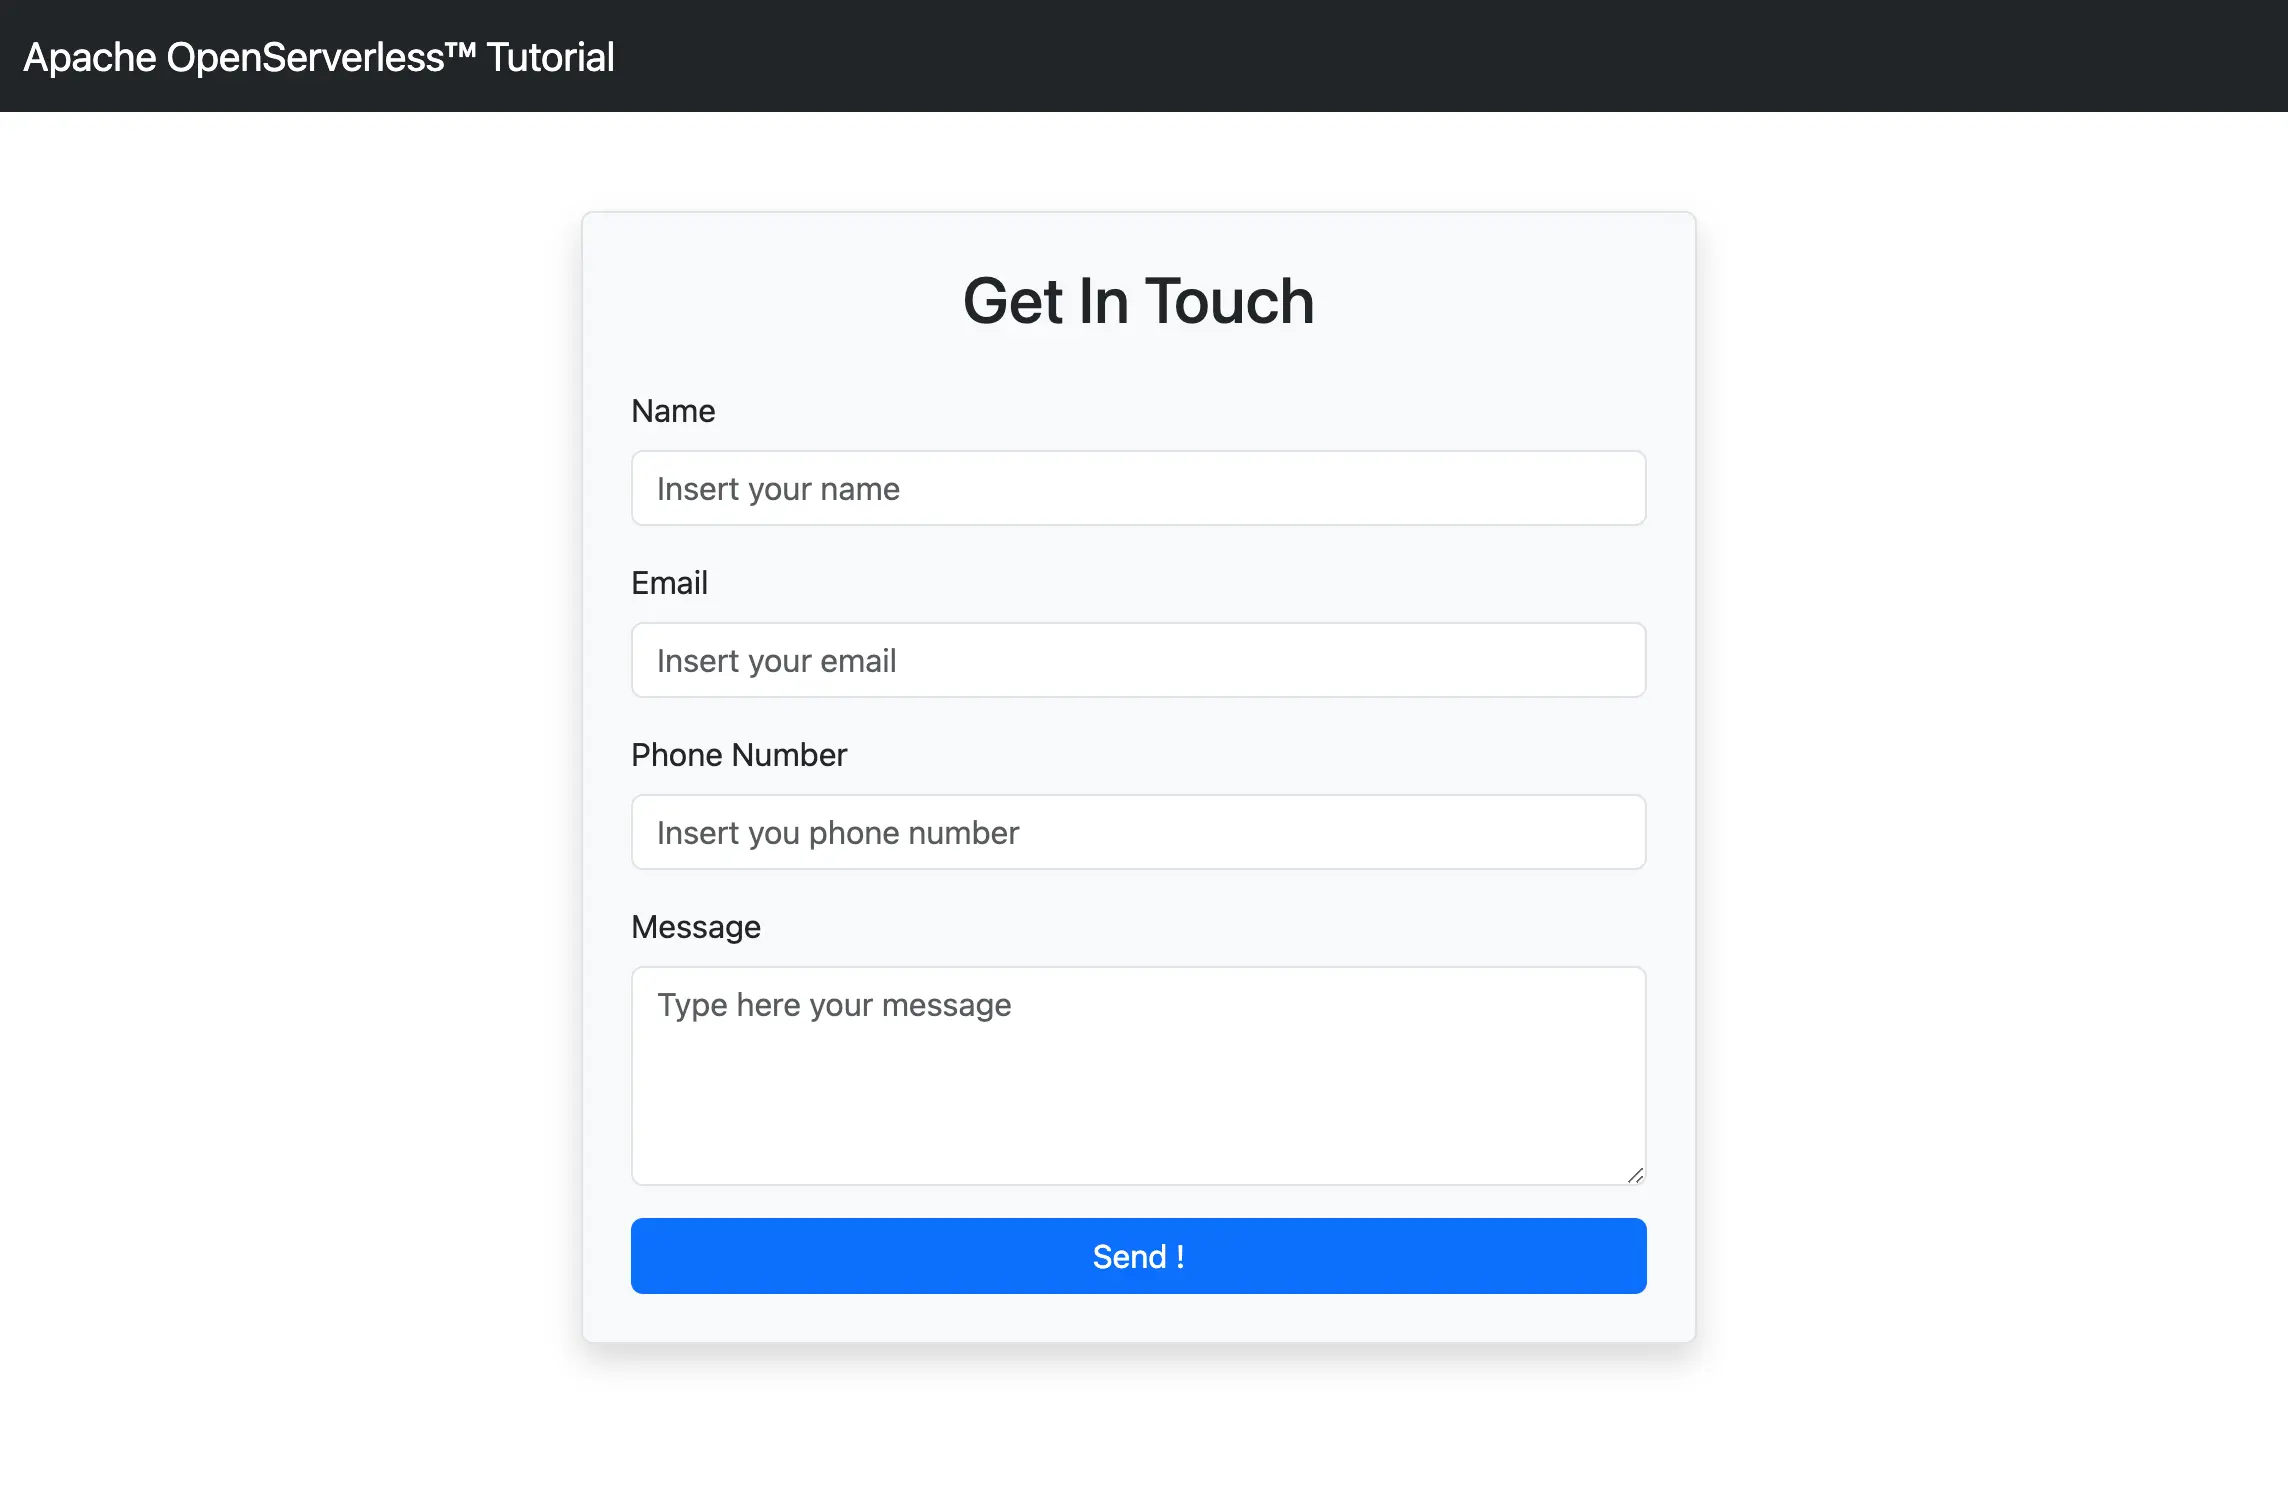
If you visit the URL within your browser, you should see
the new index page:
Development Tools
Apache OpenServerless has a set of development tools, inside the ops ide command,
details of which are available in this section of the guide.
As shown before, we will be using ops ide for publishing, as this make the process
quicker and easier.
The command ops ide login will enable the development tools.
Feedback
Was this page helpful?
Glad to hear it! Please tell us how we can improve.
Sorry to hear that. Please tell us how we can improve.