Form validation
The Contact Package
The contact form we just uploaded does not do anything. To make it work
let’s start to fill our package directory with backend actions.
Form validation
We well start to handle the form submission. We can do that by
adding a new action that will be called when the form is submitted.
Let’s create a submit.js file inside our packages/contact folder.
You directory structure should looks like this:
contact_us_app
├── packages
│   └── contact
│       └── submit.js
└── web
    └── index.html
Paste this content inside the submit.js file:
//--web true
//--kind nodejs:default

function main(args) {
    let message = [];
    let errors = [];

    // TODO: Add here Form Validation code

    // TODO: Add here the code for returning the Result
}
This action is a bit more complex. It takes the input object (called
args) which will contain the form data (accessible via args.name,
args.email, etc.). With that. we will do some validation and then
return the result.
💡 NOTE
You may have noticed the strange comments at the beginning of the file. Those comments are used by
ops ideto automatically handle the publishing of files by callingops packageorops actionas needed. In particular:
- the
--web truewill enable this as a web action;--kind nodejs:defaultwill ask OpenServerless to run this code on the nodejs default runtime.
Validation
Let’s start filling out the “Form Validation” part by checking the name:
// validate the name
if (args.name) {
    message.push("name: " + args.name);
} else {
    errors.push("No name provided");
}
Then the email by using a regular expression:
// validate the email
var re = /\S+@\S+\.\S+/;
if (args.email && re.test(args.email)) {
    message.push("email: " + args.email);
} else {
    errors.push("Email missing or incorrect.");
}
The phone, by checking that it’s at least 10 digits:
// validate the phone
if (args.phone && args.phone.match(/\d/g).length >= 10) {
    message.push("phone: " + args.phone);
} else {
    errors.push("Phone number missing or incorrect.");
}
Finally, the message text, if present:
// validate the message
if (args.message) {
    message.push("message:" + args.message);
}
Submission
With the validation phase, we added to the “errors” array all the errors we found, and to the “message” array all the data we want to show to the user. So if there are errors, we have to show them, otherwise, we store the message and return a “thank you” page.
// return the result
if (errors.length) {
    var errs = "<ul><li>" + errors.join("</li><li>") + "</li></ul>";
    return {
        body: "<h1>Errors!</h1>" +
            errs + '<br><a href="javascript:window.history.back()">Back</a>'
    };
} else {
    var data = "<pre>" + message.join("\n") + "</pre>";
    return {
        body: "<h1>Thank you!</h1>" + data,
        name: args.name,
        email: args.email,
        phone: args.phone,
        message: args.message
    };
}
Note how this action is returning HTML code. Actions can return a
{ body: <html> } kind of response and have their own url so they can
be invoked via a browser and display some content.
The HTML code to display is always returned in the body field, but we
can also return other stuff. In this case we added a a field for each of
the form fields. This gives us the possibility to invoke in a sequence
another action that can act just on those fields to store the data in
the database.
Let’s start deploying the action:
ops ide deploy
You should see output like this:
/home/openserverless/.ops/tmp/deploy.pid
PID 70925
> Scan:
>> Action: packages/contact/submit.js
> Deploying:
>> Package: contact
$ $OPS package update contact
ok: updated package contact
>>> Action: packages/contact/submit.js
$ $OPS action update contact/submit packages/contact/submit.js --web true --kind python:default --param POSTGRES_URL $POSTGRES_URL
ok: updated action contact/submit
build process exited with code 0
UPLOAD ASSETS FROM web
==================| UPLOAD RESULTS |==================
| FILES      : 1
| COMPLETED  : 1
| ERRORS     : 0
| SKIPPED    : 0
| EXEC. TIME : 40.76 ms
======================================================
URL: http://opstutorial.localhost:80
You can retrieve the url of the action with:
ops url contact/submit
You should see this output:
ok: got action submit
http://localhost:80/api/v1/web/opstutorial/contact/submit
If you click on it you will see the Error page with a list of errors, that’s because we just invoked the submit logic for the contact form directly, without passing in any args. This is meant to be used via the contact form page!
We need to wire it into the index.html. So let’s open it again and add a
couple of attributes to the form. Change the <form> tag as follow:
<form method="POST" action="/api/v1/web/opstutorial/contact/submit"
      enctype="application/x-www-form-urlencoded">
Upload the web folder again with the new changes:
ops ide deploy
Now if you go to the contact form page the send button should work. It will invoke the submit action which in turn will return some html.
If you fill it correctly, you should see the “Thank you” page.
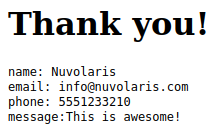
Note how only the HTML from the body field is displayed, the other
fields are ignored in this case.
The ops action command can be used for many more things besides
creating actions. For example, you can use it to list all available
actions:
ops action list
actions
/opstutorial/contact/submit                 private nodejs:21
And you can also get info on a specific action:
ops action get contact/submit
ok: got action contact/submit
{
    "namespace": "opstutorial/contact",
    "name": "submit",
    "version": "0.0.1",
    "exec": {
        "kind": "nodejs:21",
        "binary": false
    },
    "annotations": [
        {
            "key": "web-export",
            "value": true
        },
        {
            "key": "raw-http",
            "value": false
        },
        {
            "key": "final",
            "value": true
        },
        {
            "key": "provide-api-key",
            "value": false
        },
        {
            "key": "exec",
            "value": "nodejs:21"
        }
    ],
    "parameters": [
        {
            "key": "POSTGRES_URL",
            "value": "postgresql://opstutorial:<password>@nuvolaris-postgres.nuvolaris.svc.cluster.local:5432/opstutorial"
        }
    ],
    ...
}
These commands can come in handy when you need to debug your actions.
Here is the complete the submit.js action:
//--web true
//--kind nodejs:default

function main(args) {
    let message = [];
    let errors = [];

    // validate the name
    if (args.name) {
        message.push("name: " + args.name)
    } else {
        errors.push("No name provided")
    }

    // validate the email
    var re = /\S+@\S+\.\S+/;
    if (args.email && re.test(args.email)) {
        message.push("email: " + args.email);
    } else {
        errors.push("Email missing or incorrect.");
    }

    // validate the phone
    if (args.phone && args.phone.match(/\d/g).length >= 10) {
        message.push("phone: " + args.phone);
    } else {
        errors.push("Phone number missing or incorrect.");
    }

    // validate the message
    if (args.message) {
        message.push("message:" + args.message);
    }

    // return the result
    if (errors.length) {
        var errs = "<ul><li>" + errors.join("</li><li>") + "</li></ul>";
        return {
            body: "<h1>Errors!</h1>" +
                errs + '<br><a href="javascript:window.history.back()">Back</a>'
        };
    } else {
        var data = "<pre>" + message.join("\n") + "</pre>";
        return {
            body: "<h1>Thank you!</h1>" + data,
            name: args.name,
            email: args.email,
            phone: args.phone,
            message: args.message
        };
    }
}
Feedback
Was this page helpful?
Glad to hear it! Please tell us how we can improve.
Sorry to hear that. Please tell us how we can improve.